Make the Best Gipfeli Recipe at Home – Easy & Delicious
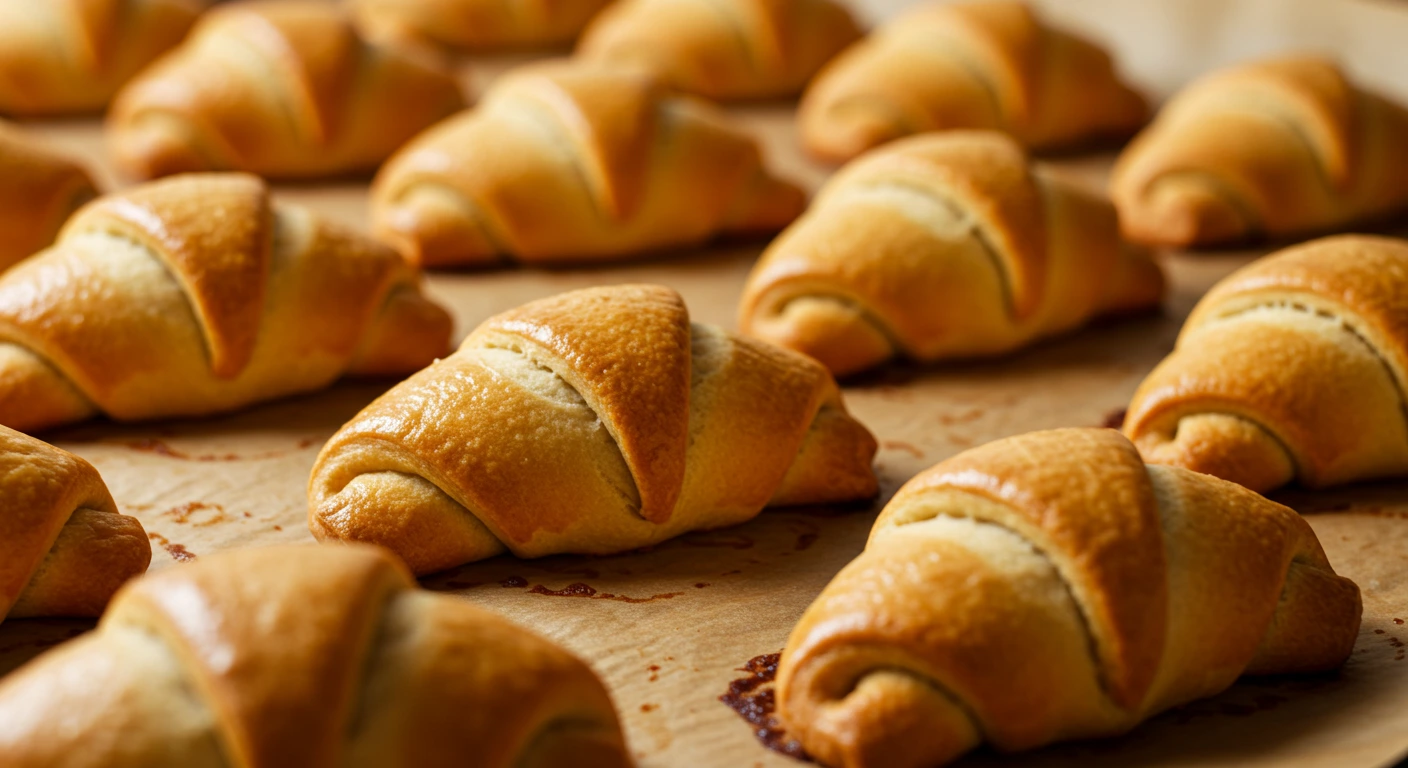
Table of Contents
What Is a Gipfeli?
If you’ve ever strolled through a quiet Swiss town on a crisp morning, you’ve likely caught the scent of freshly baked Gipfeli wafting from a local bakery. But what exactly is a Gipfeli, and why is it such a beloved staple in Swiss cuisine?
Gipfeli (pronounced gip-fuh-lee) is Switzerland’s take on the croissant — but with a character all its own. While it shares the crescent shape and flaky texture of the French croissant, a traditional gipfeli is denser and often slightly less buttery. Think of it as the croissant’s practical cousin: still indulgent, but a bit heartier and more filling.
What sets it apart even more is how it’s used in everyday life in Switzerland. It’s not just a treat — it’s a routine part of breakfast, a mid-morning snack, or even lunch when stuffed with savory fillings. Walk into any Swiss bakery and you’ll see them lined up like golden crescents of joy, often with locals grabbing one on the go with a steaming cup of coffee.
So, while it may look like just another puff pastry roll, a gipfeli is much more than that — it’s a taste of Swiss tradition, wrapped in flaky, buttery goodness.
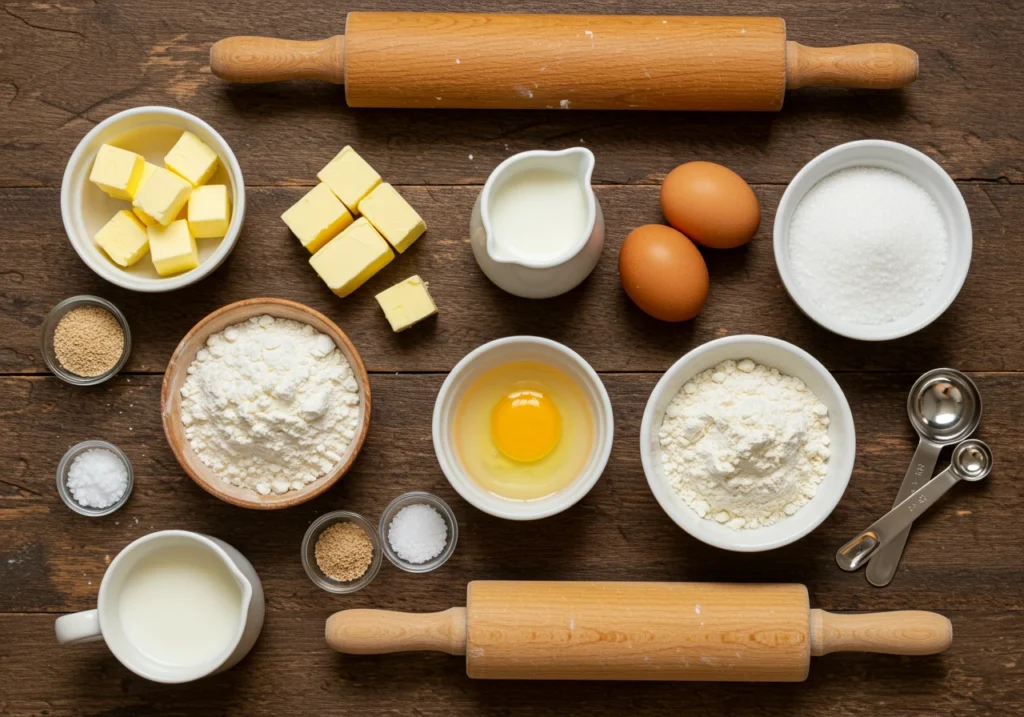
Key Ingredients for the Perfect Gipfeli Recipe
To make the best gipfeli recipe at home, you’ll need a short, but important list of ingredients. And believe me, quality matters. Each item plays a key role in giving your pastry that signature Swiss texture and flavor.
1. High-Quality Butter
There’s no hiding behind cheap butter here. Since gipfeli relies heavily on buttery layers, use unsalted, European-style butter with a high fat content. It helps create that flaky structure and rich flavor that practically melts in your mouth.
2. Flour and Yeast
You’ll need all-purpose flour or bread flour for structure. Combined with active dry yeast, these ingredients help your dough rise just the right amount to stay tender but not too airy (remember, we’re not making croissants here).
3. Milk, Sugar, and Salt
Milk adds softness to the dough. A touch of sugar gives it mild sweetness, and salt balances the flavors. These may seem like background players, but don’t underestimate their impact on the final taste.
4. Egg Wash
For that glorious golden finish, brush the gipfeli with a mix of beaten egg and milk. It’s a simple step, but it transforms the appearance and texture — from dull to bakery-worthy shine.
5. Optional Fillings
This is where things get creative. You can leave your gipfeli plain, or fill them with everything from Swiss chocolate to savory options like ham and Gruyère cheese. Sweet or savory, there’s room to play.
Tools You’ll Need to Bake Gipfeli at Home
Before you dive into rolling dough and preheating ovens, let’s talk about the gear. Having the right tools can be the difference between frustration and flawless flaky pastry.
1. Rolling Pin and Clean Surface
You’ll be rolling and folding the dough several times, so a large, flat surface and a sturdy rolling pin are essential. Chill the pin slightly if your kitchen is warm — it helps keep the butter from melting into the dough.
2. Baking Sheet and Parchment Paper
Gipfeli love space. Line a flat baking sheet with parchment to keep the bottoms from burning and to make cleanup a breeze.
3. Pastry Brush
For applying your egg wash like a pro. Silicone brushes work well, but a soft-bristle pastry brush gives a more even coat.
4. Sharp Knife or Pastry Cutter
You’ll need to cut clean triangles from your dough. A dull blade can ruin those lovely layers you’ve worked so hard for.
Optional: A kitchen scale to get even triangle sizes (if you’re feeling extra precise), and plastic wrap or clean kitchen towels to rest your dough.
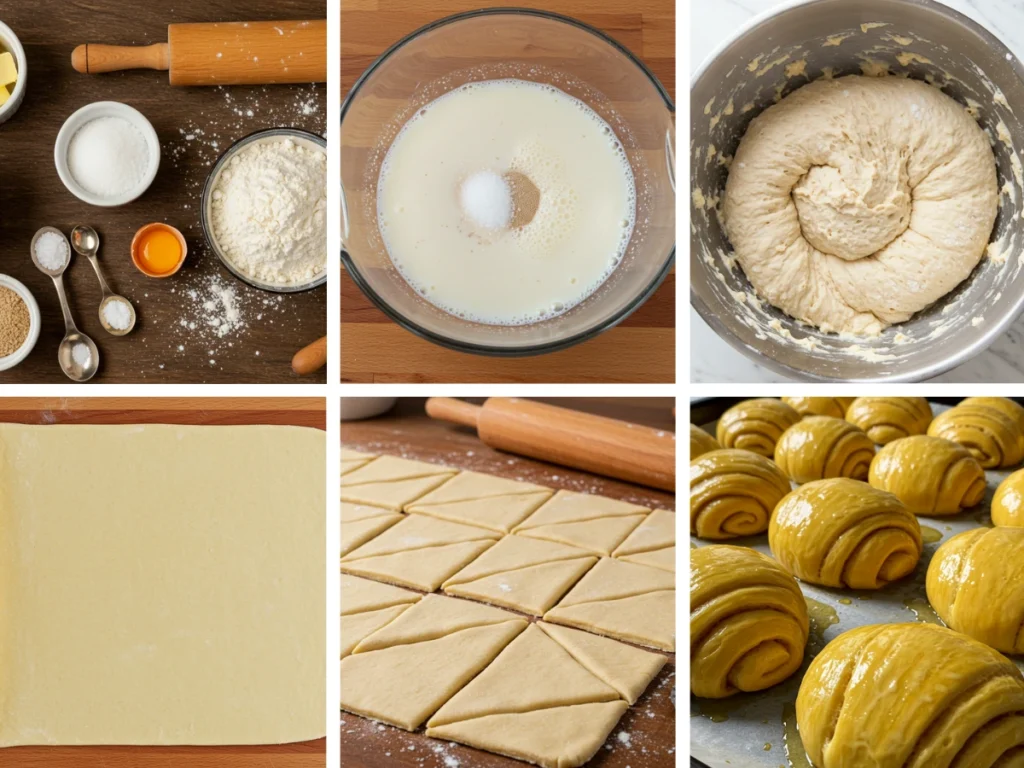
How to Make Gipfeli Dough from Scratch
Now the real fun begins. Making gipfeli dough is a little time-consuming, but not hard. You just need to be patient — think of it as pastry meditation.
Step 1: Activate the Yeast
Start by dissolving active dry yeast in warm milk (around 100°F/38°C). Add a pinch of sugar to feed the yeast and let it sit for 5–10 minutes until bubbly. If nothing happens, your yeast might be dead — and trust me, it won’t rise to the occasion.
Step 2: Mix the Dough
In a large bowl, mix the flour, sugar, and salt. Add your activated yeast mixture and begin kneading. You can do this by hand or in a stand mixer with a dough hook. Once it comes together, knead it for 10 minutes until it’s smooth and elastic.
Step 3: Let It Rise
Cover the dough with a damp towel and let it rise in a warm place for about 1–1.5 hours, or until doubled in size. Use this time to chill your butter block — you’ll need it cold when we move to folding.
Step 4: Laminate the Dough
Now comes the magic — the butter folding (aka lamination). Roll the dough into a rectangle and place a cold, thin butter slab in the center. Fold the dough over it like a letter and roll it out again. Repeat this folding and rolling process 3 times, chilling the dough in between to keep the butter solid.
This is what gives you those flaky, layered textures you dream of.
Step 5: Rest and Roll
After the final chill, roll the dough out into a large rectangle. Use your pastry cutter or sharp knife to cut long triangles, ready for rolling into that classic crescent shape.
Step-by-Step Gipfeli Recipe Instructions
You’ve made it this far — now let’s assemble and bake your homemade swiss croissant recipe. This is where things get deliciously real.
Step 1: Shape Your Gipfeli
Take each triangle of dough and, starting from the wide end, roll it tightly toward the point. You can give it a gentle curve if you want the traditional crescent shape, or leave it straight for a modern twist.
Want to stuff them? Add a teaspoon of chocolate spread, cheese, or your favorite filling before you roll.
Step 2: Final Rise
Place the shaped pastries on a parchment-lined baking sheet, leaving space between each one. Cover loosely with plastic wrap or a towel and let them rise for 30–45 minutes. This final rise adds tenderness and puff.
Step 3: Apply Egg Wash
Just before baking, brush each gipfeli with egg wash. This gives that rich, bakery-style finish and helps seal in moisture.
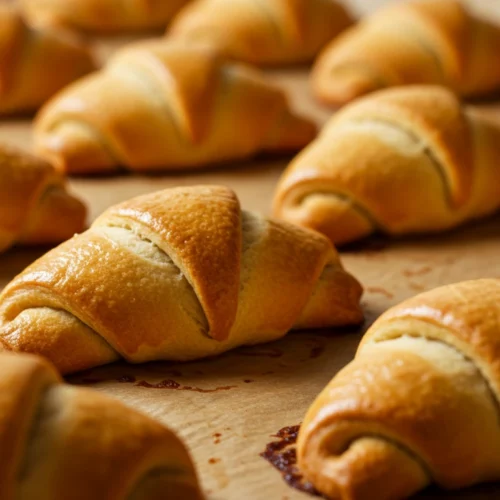
Step 4: Bake to Golden Perfection
Bake in a preheated oven at 375°F (190°C) for 20–25 minutes, or until golden brown and crisp on the outside. Don’t overbake — the goal is flaky on the outside, soft and tender inside.
Let them cool just enough so you don’t burn your tongue — but trust me, warm gipfeli are unbeatable.
Easy Filling Ideas to Upgrade Your Homemade Gipfeli Recipe
Plain, buttery gipfeli are fantastic on their own, but if you want to take things up a notch, try filling them. Here’s where you can really make your gipfeli uniquely yours — transforming this classic Swiss pastry into a sweet treat or savory snack that fits any occasion.
1. Sweet Fillings
If you’ve got a sweet tooth, these ideas will hit the spot:
- Chocolate: Place a strip of dark chocolate near the base of the triangle before rolling. Once baked, you’ll have a gooey, rich center that melts into every bite.
- Jam: Apricot, raspberry, or plum jam are popular in Swiss bakeries. Just a teaspoon near the base gives a fruity surprise.
- Nut Paste: Almond or hazelnut paste adds a nutty richness reminiscent of marzipan pastries.
- Pistachio Cream: For something truly special, try filling your gipfeli with pistachio cream. Check out The Best Pistachio Cream Recipe You’ll Ever Try for a silky, flavorful filling that elevates any pastry.
2. Savory Options
Want something hearty for lunch or brunch?
- Ham and Cheese: A thin slice of ham and Swiss cheese makes for the perfect portable meal.
- Spinach and Feta: Mix cooked spinach with crumbled feta, season lightly, and roll into the dough.
- Mushroom and Gruyère: Sauteed mushrooms with a sprinkle of Gruyère cheese create a decadent, earthy filling.
3. Tips for Stuffing
Keep your filling amount small — about a teaspoon or so — and avoid overfilling, which can lead to leaks. Also, seal edges gently with your fingers as you roll to help keep the goodies inside.
Serving Suggestions for Swiss Breakfast Bliss
Now that you’ve baked your perfect gipfeli, it’s time to enjoy them the Swiss way (or put your own spin on it).
1. Pair with Coffee or Hot Chocolate
In Switzerland, gipfeli and coffee is the classic morning ritual. The rich bitterness of coffee perfectly complements the buttery layers of the pastry. If you’re feeling indulgent, pair with thick European-style hot chocolate for a cozy treat.
2. When to Serve
Gipfeli are a staple at breakfast, but they’re also common as a mid-morning snack or light lunch. In fact, Swiss commuters often grab a gipfeli on their way to work — think of it as the Swiss equivalent of grabbing a bagel or muffin on the go.
3. Storing Leftovers
If you happen to have leftovers (though I doubt you will), store them in an airtight container at room temperature for up to two days. Reheat in a warm oven for 5 minutes to revive that crispy exterior.
4. Transforming Leftovers
Leftover gipfeli can be sliced open and filled with more savory ingredients to make quick sandwiches — or dipped into soup for a hearty side.
Frequently Asked Questions About Gipfeli Recipe
Over the years, I’ve heard plenty of questions from friends and fellow home bakers about making gipfeli. Let’s tackle some of the most common:
Q: Can I use store-bought puff pastry rolls?
Yes! If you want to skip the lamination process, store-bought puff pastry rolls works fine. Just remember, Swiss gipfeli dough is slightly less rich than croissant dough, so your texture may be a bit lighter — but still delicious.
Q: How long do homemade gipfeli recipe last?
They’re best eaten the same day while still fresh and flaky. If you need to store them, keep in an airtight container at room temperature for up to two days. Reheat in the oven to restore crispness.
Q: Can I make gipfeli recipe gluten-free or vegan?
You can experiment with gluten-free flour blends, but results will vary — gluten gives the dough its stretchy structure. For vegan versions, use plant-based butter and skip the egg wash (or brush with plant milk instead).
Q: What’s the difference between gipfeli and croissants?
Gipfeli tend to be slightly denser and less buttery than croissants. Croissants usually have more layers and air pockets, while gipfeli feel a touch heartier — perfect for grabbing on the go without crumbling into a million flakes.
To learn more about the history and tradition of Swiss pastries, visit Swiss Cuisine on Wikipedia.
Final Tips to Perfect Your Homemade Gipfeli
Before you roll up your sleeves again, here are a few final pointers to help you master the art of baking gipfeli at home:
1. Keep the Butter Cold
If your butter starts melting into the dough while you fold and roll, the layers won’t develop properly. Work quickly, chill the dough between folds, and if needed, chill your rolling pin too.
2. Don’t Rush the Rise
Patience is key. Letting your dough rise properly (both the first and second rise) ensures a soft, tender interior. If your kitchen is cold, you can place the dough in the oven (turned off) with the light on to create a warm environment.
3. Test for Doneness
Baking times can vary depending on your oven and the size of your gipfeli. Look for a rich golden brown color on top, and tap the bottom gently — it should sound hollow.
4. Make It Your Own
Swiss bakeries often have regional variations — try adding herbs, sprinkling coarse salt on top before baking, or filling with your favorite flavors to personalize your pastries.
Conclusion
Making gipfeli at home is more than just following a recipe — it’s about bringing a piece of Swiss tradition into your kitchen, enjoying the process, and sharing something warm, buttery, and absolutely delightful with the people you love.
So next time you’re craving something special for breakfast, skip the store-bought croissants and give this homemade gipfeli recipe a try. I promise — once you taste that first golden, flaky bite, you’ll be hooked.
Happy baking!
Make the Best Gipfeli Recipe at Home
Ingredients
- 4 cups all-purpose flour
- 1 packet 7g active dry yeast
- 1 cup warm milk 100°F / 38°C
- 2 tbsp sugar
- 1 tsp salt
- 1 cup 225g unsalted high-fat European-style butter (cold, for lamination)
- 1 egg for egg wash
- Optional: chocolate jam, ham, cheese, or other fillings
Instructions
Activate Yeast:
- Combine warm milk, yeast, and a pinch of sugar in a small bowl. Let sit for 5-10 minutes until frothy.
Make Dough:
- In a large bowl, mix flour, sugar, and salt. Add yeast mixture and knead until smooth and elastic (about 10 minutes).
First Rise:
- Cover dough with damp towel. Let rise 1–1.5 hours until doubled.
Prepare Butter Block:
- While dough rises, shape butter into thin rectangle (about ½ inch thick). Chill in fridge.
Laminate Dough:
- Roll dough into large rectangle. Place cold butter slab in center. Fold dough over butter like a letter. Roll gently, fold into thirds, chill 20 minutes. Repeat rolling and folding process 3 times total, chilling between each turn.
Shape Gipfeli:
- Roll dough into large rectangle (¼ inch thick). Cut into long triangles. Add optional filling near wide end, roll into crescent shape.
Second Rise:
- Place on parchment-lined baking sheet. Let rise 30–45 minutes until puffy.
Egg Wash:
- Preheat oven to 375°F (190°C). Brush gipfeli with beaten egg.
Bake:
- Bake 20–25 minutes until golden brown. Cool slightly before serving.
Notes
- Keep butter cold while laminating to ensure flaky layers
- Sweet fillings like chocolate or jam work great; savory options like ham and cheese also shine.
- Best enjoyed fresh on the same day.
Review Our Recipe: Your Feedback Makes a Difference
There are no reviews yet. Be the first one to write one.